Keep Your Headlamp Trail-Ready: Lens, Contacts, and Battery Care
Clean a headlamp, check its contacts, care for batteries, and store it properly by following the instructions for your model.
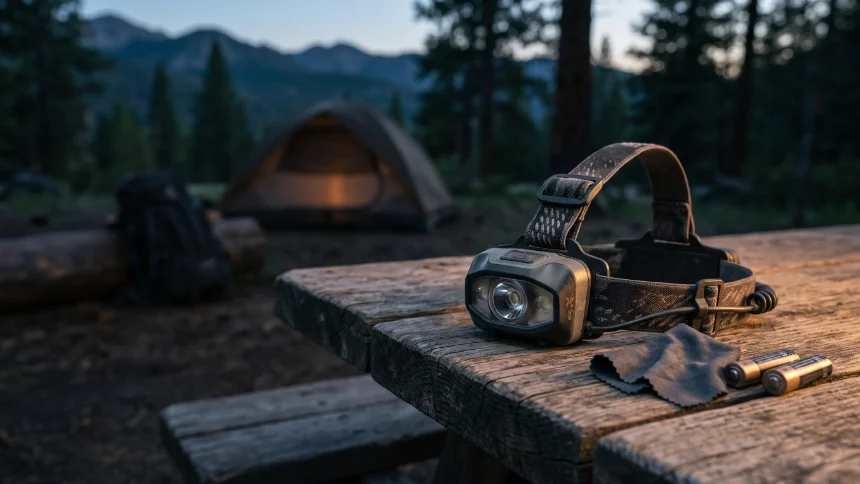
A headlamp often sits unnoticed in a pack until the light starts flickering, a button feels gritty, or the battery is flat just when you need both hands free. Dirt, moisture, and poor battery storage can all cause avoidable problems, but cleaning a headlamp takes a lighter touch than cleaning most fabric gear.
The goal is to keep the lens clear, the controls free of grime, and the battery compartment in good condition without forcing water into the housing. Because headlamps differ in water resistance, battery type, and construction, the manufacturer’s instructions should guide any cleaning or storage beyond the basics below.
Quick Answer
Turn the headlamp off and remove disposable batteries if the manual allows it. Wipe the exterior with a soft, slightly damp cloth, clean around buttons and straps gently, and dry the unit fully before storage. Keep battery contacts clean and dry, use the correct battery type and orientation, and follow the maker’s guidance for rechargeable models. Do not immerse the lamp, spray cleaner into openings, or use metal tools on electrical contacts.
Know Which Parts Need Different Care
A headlamp combines electronics with a fabric or elastic strap, so each part needs a different approach. The housing may tolerate a damp wipe, while the charging port and battery compartment need extra care. Never assume a water-resistance rating means the lamp can be submerged or cleaned under running water. Follow the specific instructions for your model.
| Part | Routine Care | Avoid |
|---|---|---|
| Lens or light window | Wipe gently with a soft, clean cloth. | Abrasive pads, gritty cloths, and harsh solvents. |
| Housing and buttons | Remove dust with a dry cloth or soft brush. Use a lightly damp cloth if permitted. | Spraying liquid directly into seams, ports, or switches. |
| Headband | Remove it only if designed to detach, then wash as directed and dry completely. | Stretching elastic excessively or reattaching it while damp. |
| Battery compartment | Keep it dry and free of loose dirt. Inspect any visible seal. | Forcing the cover, damaging the gasket, or using sharp metal tools. |
| Charging port | Keep the port clean and dry. Follow the maker’s cleaning instructions. | Charging while wet or pushing objects into the port. |
Clean the Headlamp Without Damaging It
1. Switch It Off Before Cleaning
Turn the lamp off before cleaning. If it uses replaceable batteries, remove them when the manual recommends it, especially before a longer period of storage. For a rechargeable headlamp, disconnect the charging cable and do not begin charging until the unit and port are completely dry.
2. Brush Away Dry Grit
Use a soft brush or clean cloth to remove dust, sand, and dried mud from the housing, strap clips, and edges around the buttons. Start dry so you do not rub grit across the lens or push wet dirt into seams.
3. Wipe the Lens and Housing
Use a clean microfiber cloth or another soft cloth suitable for the lens. If the maker permits moisture, dampen the cloth slightly rather than wetting the headlamp directly. Wipe gently and avoid household glass cleaners, solvents, or abrasive products unless the instructions specifically approve them.
If grime is lodged around a button, use a soft brush and light strokes. Do not pry at the button or try to open a sealed housing. If a control remains stuck after surface cleaning, check the manufacturer’s troubleshooting advice.
4. Clean the Headband Separately If Allowed
Sweat and sunscreen can build up on the strap. If the band is removable, follow the product’s washing instructions. Otherwise, wipe accessible areas with a cloth that is only as damp as the manual permits. Let the strap dry fully before wearing or storing it.
5. Let Every Part Dry Before Closing It Up
Leave the lamp in a dry, ventilated place after cleaning. Pay attention to the battery cover, strap attachments, and charging-port cover. Do not use a heater, a hair dryer on high heat, or direct flame to speed up drying.
Battery Contacts: What to Check
When a headlamp flickers or fails to turn on, the battery may be depleted, inserted incorrectly, or unable to make a good connection. Start with the simple checks in the manual before attempting any repair.
-
Confirm that batteries are the specified type and installed in the correct direction.
-
Look for moisture, dirt, or unusual discoloration in the battery compartment.
-
Check that the cover closes properly and that any visible seal is clean and undamaged.
-
Use only the cleaning method recommended by the manufacturer for the contacts.
-
If a battery is leaking, swollen, unusually hot, or visibly damaged, avoid direct contact with any residue and follow the battery maker’s safe disposal guidance.
Do not scrape contacts with a knife, screwdriver, or other metal object. If you see heavy corrosion, damaged contacts, a torn seal, or evidence that liquid has entered the housing, stop using the lamp until the manufacturer or a qualified repair service advises you. A headlamp is not worth risking a short circuit or further damage to save a few minutes.
Rechargeable Headlamps Need Extra Attention
For a rechargeable model, keep the charging-port cover closed during use when the design requires it. Before connecting a cable, make sure the port is clean and dry. Use the cable and power source recommended by the manufacturer, and do not charge a headlamp that has been exposed to water until you have followed the model’s drying and safety instructions.
Battery-care advice varies between products. Some models are designed to remain charged between trips; others have specific recommendations for long-term storage. Follow the manual rather than applying a universal charging percentage or schedule.
Store It So It Works on the Next Trip
Store the headlamp clean and dry in a place away from excessive heat and moisture. Keep it where you can find it before a hike, and avoid packing it beneath heavy equipment that could press the buttons or crack the housing.
For headlamps with disposable batteries, check the manufacturer’s advice about removing them during extended storage. This can help reduce the risk of leakage damaging the battery compartment. Keep spare batteries in a case so their terminals cannot touch keys, coins, or other metal objects.
Before a trip, test the lamp at home. Check the main beam, any lower setting you rely on, the button response, and the strap fit. A brief test is more useful than discovering a problem after dark.
Common Headlamp Care Mistakes
-
Rinsing the whole lamp under a tap: Water resistance varies, and seals can be compromised by age or damage.
-
Spraying cleaner directly onto it: Liquid can enter buttons, ports, or housing seams.
-
Cleaning the lens with a rough cloth: Trapped grit can leave scratches or haze.
-
Closing a damp battery compartment: Moisture can remain trapped where it is difficult to see.
-
Leaving disposable batteries inside indefinitely: Leakage can damage contacts during long storage.
-
Ignoring a cracked housing or damaged seal: The lamp may no longer provide the protection it was designed for.
-
Skipping the pre-trip test: A light that worked months ago may now have a depleted battery or a loose connection.
When Cleaning Is Not Enough
Seek service or replace a headlamp with a cracked housing, damaged battery contacts, a charging port that no longer works reliably, a compromised seal, or repeated unexplained flickering. If the light output has become unreliable, do not depend on it as your only light source on a route where darkness could create a hazard.
For trips where lighting is important, carry a suitable backup and make sure you know how to operate it. Gear care improves reliability, but it cannot guarantee that an electronic device will never fail.
A Two-Minute Pre-Trip Check
-
Turn the headlamp on and test the modes you expect to use.
-
Check that the lens is clean and the buttons respond normally.
-
Inspect the strap, housing, battery cover, and visible seals.
-
Confirm the battery is charged or the spare batteries are ready.
-
Pack it somewhere accessible, with spare batteries stored safely.
A headlamp does not need elaborate maintenance. Gentle cleaning, dry storage, careful battery handling, and a quick test before departure are usually the most useful habits. When anything about cleaning, charging, or water exposure is unclear, use the instructions for your exact model rather than guessing.