How to Inspect and Clean Your Bike Crankset
Learn how to check a crankset for visible damage or looseness, clean it gently, and recognize when a bicycle mechanic should inspect it.
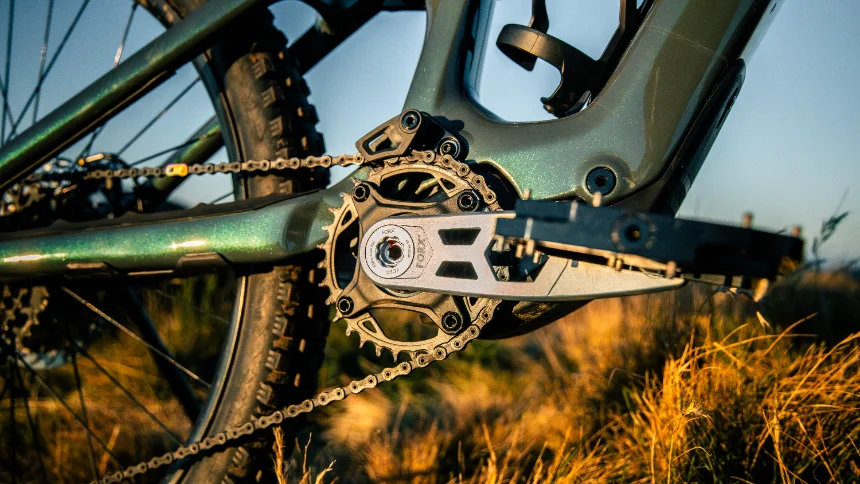
The crank arms and chainrings turn your pedaling into drivetrain movement. You can inspect them for visible damage and clean accessible grime at home, but a quick check cannot diagnose a bearing or prove a damaged part safe to ride.
Routine Crankset Inspection
Take a quick look over your crank arms and chainrings every now and then. Keep an eye out for dents, surface cracks and obvious signs of impact damage.
With the bike stationary, look for visible cracks, deformation, missing fasteners, or a crank arm that appears loose. Do not ride if a crank moves independently of the bottom bracket or you see suspected structural damage. Do not try to identify the cause by tightening bolts at random; crank designs and torque requirements vary.
If pedaling produces a new knock, rocking, or grinding sound, stop and inspect the drivetrain without riding under load. A sound can come from several components; pedal feel alone cannot show whether a crank arm, pedal, bearing, or another part has failed. Ask a qualified mechanic when the source is unclear.
Do not keep riding if you spot these red flags. Get your bike checked by a professional shop before your next outing. Serious crankset failures can create safety risks on the trail.
Crankset Cleaning Workflow
Dirt and grit build up around chainrings over time and drag down performance. Most modern cranks use sealed bearings, so you won’t need to regrease internal bearings as part of regular home cleaning.
Keep cleaning water and cleaner away from bearing seals and follow the bicycle maker’s instructions. Shimano’s crankset safety and care notice recommends neutral detergent for its crank arm and bottom bracket; other brands or finishes may specify different care.
For routine grime, use a soft brush or cloth and a cleaner approved for the bicycle’s finish. Avoid harsh solvent and sharp tools around seals, frame paint, and moving parts. Do not wrap a rag around a screwdriver near the chainrings; use a purpose-made brush and keep fingers clear of pinch points.
Keeping this assembly clean and dry goes a long way toward preventing premature wear on your whole drivetrain.
Quick Troubleshooting Reference
| Symptom | Possible Issue | Recommended Action |
|---|---|---|
| Crank arm side‑to‑side wobble | Loose bolts or worn bearings | Check bolts or visit bike shop |
| Rocking feel while pedaling | Bent crank or damaged pedal | Test pedal spin, replace faulty part |
| Gritty or noisy cranking | Cause is not clear from the sound alone | Clean accessible dirt gently; if noise remains, ask a mechanic |
If crank movement, a crack, or unusual noise remains after surface cleaning, do not use this table as a diagnosis. Leave the bike out of use until a bicycle mechanic has checked it. REI’s pre-ride inspection guide also advises against riding with a loose crank.