How to Replace a Sleeping Bag Zipper Slider
Learn how to identify a worn sleeping-bag zipper slider, check for other zipper damage, and choose a compatible repair or service option.
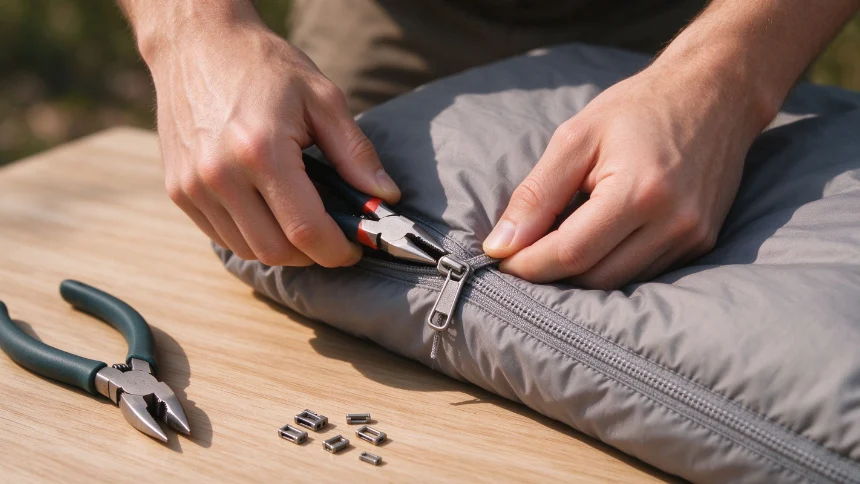
A zipper that separates behind the pull may have a worn slider, but stuck fabric, dirt in the teeth, or damaged teeth can cause similar trouble. Start with a close look before reaching for pliers. A sleeping bag that will not close should be repaired or replaced before you rely on it in cold conditions.
The slider is the moving part that guides the two sides of the zipper together. Replacement can be a small repair when the slider is the only damaged part and the correct size and type are available. Zipper systems differ, and some repairs are better left to a gear-repair shop.
Get Your Tools Ready
You don’t need a fancy repair kit. Just a few simple supplies.
| Item | Use | Note |
|---|---|---|
| End nippers | Remove old stopper | Work gently to protect fabric |
| Needle-nose pliers | Crimp new stopper | Squeeze lightly |
| Zipper slider(s) | Replace a worn slider | Match the zipper and check whether the bag uses one or two sliders |
| Zipper stoppers | Lock sliders in place | Keep a spare |
Identify the zipper and slider using markings and the bag maker’s documentation. If you cannot confirm a compatible part, ask the maker or a repair service instead of forcing a close-looking slider onto the zipper.
First Try: Tighten the Slider
Before you rip anything apart, see if you can bring the old slider back to life. When the opening has stretched too wide, a gentle crimp sometimes does the trick.
Some repair guides describe a small adjustment to a worn slider, but squeezing it can jam or break the part. Attempt this only if the zipper or repair instructions support it and you can make a very small, even adjustment; otherwise replace the slider or use a repair service.
Keep in mind this is a stopgap. If the crimp works, great, but treat it as temporary. The slider metal is already fatigued, and it’ll stretch out again.
Swap In a New Slider
If crimping doesn’t cut it, it’s time to replace the slider properly.
If the exact part is confirmed and you are comfortable with small zipper repairs, follow a repair guide for the same stopper and zipper construction. Removing a stopper with nippers can cut the zipper tape or sleeping-bag shell. Photograph the slider orientation before removing it, keep the tool away from fabric, and stop if the stopper resists or the tape begins to fray.
Install only the compatible slider and stopper in the orientation specified for that zipper. Secure the stopper without crushing the teeth or tape. If the new slider catches, opens the zipper behind it, or does not travel smoothly, do not force it; have the repair checked.
Test the repair gently along the full zipper length while the bag is empty. Check that the teeth stay joined and that the slider does not catch the shell. A successful bench test does not repair broken teeth or damaged tape.
Common Zipper Problems
| Symptom | Cause | Fix |
|---|---|---|
| Slides but pops open | Worn slider | Tighten or replace |
| Stuck and won’t move | Debris in teeth | Brush out with dry toothbrush |
| Teeth won’t align | Bent or broken teeth | Replace the zipper |
Avoid household oils, waxes, or soap unless the zipper maker specifically recommends them; they can collect dirt or affect nearby fabric. REI’s sleeping-bag zipper guide covers compatible sliders, stopper removal, and cases better handled by a repair service. Check the bag maker’s instructions too.