How to Wax Your Skis or Snowboard at Home
Prepare skis or a snowboard for glide waxing with the right tools, safe ventilation, product instructions, and a clear sense of when a shop tune is needed.
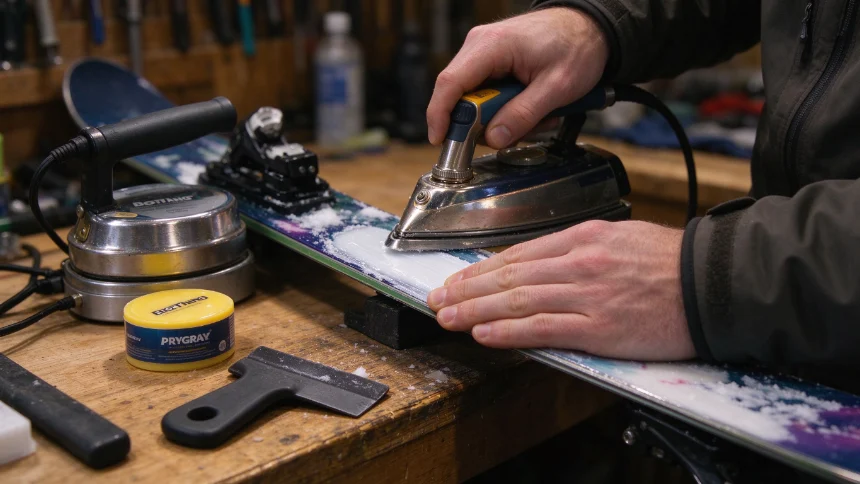
Hot waxing can help maintain glide, but it does not sharpen an edge or repair a damaged base. A home wax is appropriate only when you have a stable work area, the right wax and tools, and can follow their instructions safely.
Why Wax Matters
Glide wax is applied to the base to suit snow conditions and the manufacturer’s maintenance recommendations. A waxed base does not prevent impact damage, and waxing is different from edge sharpening or base repair.
Slow glide can have more than one cause, including snow conditions, base condition, and wax choice. It is not by itself a diagnosis that the base needs a particular wax.
What You Need
You don’t need a professional tuning shop setup. A basic kit is enough.
| Tool | What It Does | Notes |
|---|---|---|
| Wax iron | Melts and spreads wax | Don’t use a regular clothes iron |
| Ski or board wax | Fills and protects the base | Pick one for your snow temperature |
| Plastic scraper | Removes excess wax | Flexible ones work best |
| Nylon brush | Opens the base structure | Use after scraping |
| Clean rag | Wipes down edges | For finishing |
The Waxing Process
Work in a well-ventilated area with a stable ski or board support. Follow the wax and iron labels, use appropriate protective equipment, and keep the hot iron away from skin, cords, and flammable materials. Use base cleaner only if approved for the equipment and product; let any cleaner dry as directed before waxing.
Set a dedicated waxing iron to the temperature on the wax package. Keep it moving as directed; do not leave it in one spot. If wax smokes, stop heating, lower the temperature according to the product instructions, and improve ventilation. Do not use a clothes iron for household laundry afterward.
Apply wax only to the intended glide surface, away from bindings and other components. Let it cool for the time and conditions specified by the wax maker; there is no single cooling time for all products.
Scrape off the excess wax with the plastic scraper, moving from tip to tail. Keep scraping until the shavings get thin. Then brush the base with the nylon brush to open up the structure.
How Often to Wax
There is no universal number of days between waxes. Follow the equipment and wax maker’s guidance, and consider how often you ride, snow conditions, and the visible condition of the base. Swix’s glide-wax instructions give a product-specific sequence; its waxing safety guidance calls for ventilation, suitable protection, and not overheating the iron.
Don’t Overthink It
If you are new to hot waxing, practice only with equipment you can secure safely and the exact product instructions in front of you. Do not use a valuable or damaged board as a practice surface if you are unsure about the process.
When to Take It to a Shop
Deep base gouges, loose edges, delamination, or damage near a binding should be assessed by a qualified shop. Edge sharpening is a separate job; if you are unsure how to secure the equipment or use a hot iron safely, ask a shop to handle the wax as well.