How to Choose a Hiking Headlamp
Learn how to choose a hiking headlamp by comparing brightness, battery life, beam patterns, power options, comfort, and weather resistance.
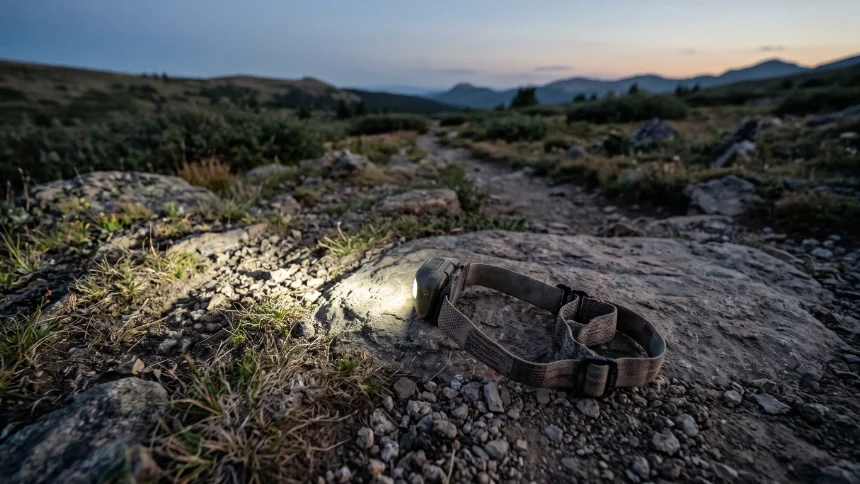
A reliable headlamp can make an early start, an unexpected delay, or a dark trail much easier to manage. But choosing one is not just about finding the highest lumen rating. The right model should provide useful light, last long enough for your plans, fit comfortably, and remain dependable in the conditions you expect to encounter.
1. Choose Brightness for Your Activities
Headlamp brightness is measured in lumens. Higher output can help illuminate distant trail features, but it usually consumes more power and may be unnecessary for simple tasks around camp.
-
100–200 lumens: Often sufficient for basic tasks around camp and short walks in familiar surroundings.
-
200–400 lumens: A useful range for many general hiking needs, including walking on trails after dark.
-
400 lumens and above: May suit faster movement, more demanding terrain, or situations where stronger illumination is useful.
These ranges are starting points rather than strict requirements. Actual visibility depends on beam shape, terrain, weather, and how the light performs at its selected setting. A well-designed headlamp with a useful beam can be more practical than a model with an impressive maximum output that quickly dims.
2. Look Beyond the Maximum Lumen Rating
Some headlamps produce a broad beam that lights the ground nearby, while others project a narrower beam farther ahead. A combination of both can be helpful when navigating uneven trails.
Check whether the lamp offers adjustable brightness. A low setting helps preserve battery life during breaks or camp chores, while a stronger setting can be used when you need to inspect the trail ahead. A red-light mode may be useful for certain camp tasks, but it should not replace adequate white light for navigating difficult terrain.
3. Check Battery Life and Power Options
Battery life matters as much as brightness. Manufacturers may advertise runtime at a low setting, so read the conditions behind the rating. Some lights gradually dim as the battery drains; others maintain brightness for a period before stepping down.
Rechargeable models can be convenient for frequent use, while replaceable-battery models may be easier to replenish on longer trips where charging is unavailable. Some headlamps support both options.
-
Runtime at the brightness you expect to use
-
Rechargeable or replaceable battery compatibility
-
Charging method and charging time, if applicable
-
Battery indicator or low-power warning
-
Availability of spare batteries or a suitable power source
-
Performance in the temperatures you expect
Cold weather can reduce battery performance, especially with some rechargeable cells. Keep spare power protected from moisture and follow the manufacturer’s storage and temperature guidance.
4. Consider Comfort and Ease of Use
A headlamp should stay in place without creating uncomfortable pressure. Check the weight, strap adjustment, balance, and whether the lamp tilts easily. A lighter design can be more comfortable over several hours, but not if it compromises the features you need.
Try operating the controls with gloves if you hike in cold weather. Buttons should be easy to locate, and the settings should be simple enough to change without cycling through a confusing sequence of modes.
5. Check Weather Resistance and Durability
Hiking headlamps may be exposed to rain, splashes, dust, and accidental drops. Look for the manufacturer’s ingress protection rating, commonly shown as an IP code, and check what it actually covers.
Water resistance does not mean every headlamp can be submerged. Choose a rating appropriate for your conditions, keep charging ports properly sealed, and avoid assuming that a model is waterproof simply because it is marketed for outdoor use.
6. Use This Buying Checklist
-
Brightness suits your usual trails and activities
-
Beam pattern provides useful near and distant visibility
-
Runtime is adequate at practical brightness settings
-
Battery type suits your access to charging or replacements
-
Headband and controls feel comfortable and intuitive
-
Weather resistance matches the conditions you expect
-
Weight and price fit your needs
-
A dependable backup light is included in your safety plan
Choose for the Conditions You Actually Hike In
The best hiking headlamp is not necessarily the brightest or most expensive. Prioritize dependable runtime, a useful beam, comfortable controls, and suitable weather protection. Before each trip, check the charge or batteries and test the lamp. Carry a backup light when appropriate, especially on routes where darkness could create a serious problem.
Trail tip: Plan your lighting around the possibility of finishing later than expected. A headlamp is essential backup equipment even when you intend to complete your hike in daylight.