How to Choose a Hiking Water Bottle
Learn how to choose a hiking water bottle by comparing capacity, material, weight, opening design, durability, and ease of cleaning.
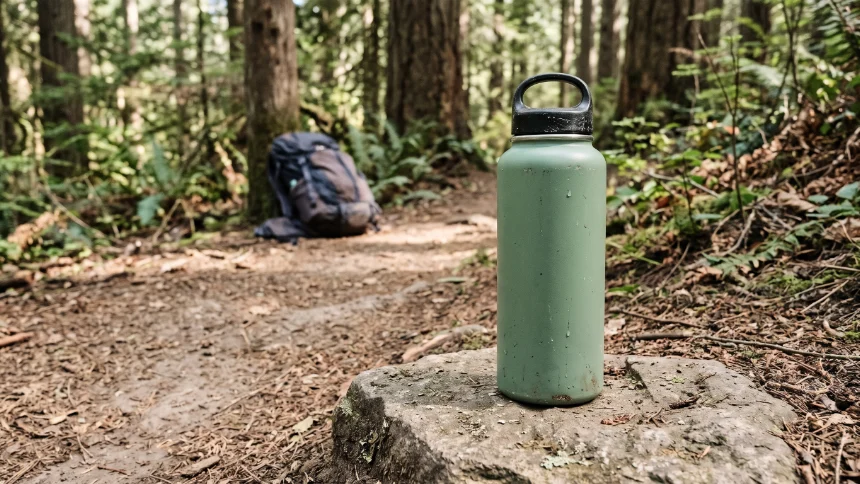
A good hiking water bottle should be easy to carry, comfortable to drink from, and dependable throughout a day on the trail. The right choice depends on how far you hike, how much water you need, and what kind of conditions you usually encounter.
With options ranging from lightweight plastic bottles to insulated stainless steel designs, it is easy to focus on appearance or price and overlook the features that matter most outdoors. Understanding a few practical differences can help you choose a bottle that suits your hiking habits without adding unnecessary weight to your pack.
1. Choose a Capacity That Matches Your Hike
Capacity is one of the first things to consider. A small bottle may be sufficient for a short walk with reliable refill points, while a longer or more exposed route may require considerably more water.
-
Short hikes: Check the route, weather, and access to safe refills before choosing a bottle.
-
Day hikes: Consider the full outing, including delays, and whether you can carry sufficient water.
-
Long or strenuous hikes: Consider carrying multiple bottles or combining a bottle with a hydration reservoir.
These are general starting points, not fixed hydration targets. Heat, elevation, exertion, body size, and access to safe water all affect how much you need. Plan your water supply around the specific route rather than relying on bottle capacity alone.
2. Compare Bottle Materials
The material affects weight, durability, taste, insulation, and maintenance. There is no single best option for every hiker.
Plastic
Reusable plastic bottles are usually lightweight and affordable. They are easy to carry and work well for everyday hikes. Look for products specifically designed for repeated drinking-water use, and follow the manufacturer’s cleaning and temperature guidance. Thin plastic models may be less resistant to damage than sturdier alternatives.
Stainless Steel
Stainless steel bottles are generally durable and resist retaining odors when cleaned properly. Insulated models can keep drinks cold for longer, which is useful on hot trails. The trade-off is extra weight, especially with double-wall construction. Non-insulated steel bottles are often lighter but do not provide the same temperature control.
Aluminum
Aluminum bottles can offer a relatively light, rigid design. Many have an internal lining, so inspect the manufacturer’s care instructions and avoid using a bottle if its lining is damaged. Aluminum models vary in durability and insulation, and most standard designs do not keep drinks cold for long.
3. Pay Attention to Weight and Shape
Every item adds up when you carry a pack for several hours. An empty bottle that feels light in a store may become much heavier when filled, so consider both its construction and the amount of water it holds.
Shape matters, too. A slim bottle may slide into a backpack’s side pocket more easily, while a wide bottle can be stable on the ground and easier to fill. Check the dimensions of your pack’s bottle pockets before buying. If you prefer to keep your bottle inside the pack, consider whether its shape makes it easy to retrieve without unpacking other gear.
4. Find a Lid You Can Use on the Trail
A bottle is only convenient if you can drink from it comfortably while taking a break or walking at a safe pace.
-
Wide-mouth lids: Make filling, adding ice, and cleaning easier, but may spill more readily if you drink while moving.
-
Narrow-mouth lids: Allow controlled sipping and can reduce splashing, though they may be harder to clean.
-
Flip-top or push-button lids: Offer quick access but have extra moving parts that need regular cleaning.
-
Straw lids: Can make sipping convenient, but the straw and small components require careful washing.
Check whether the lid seals securely when the bottle is packed horizontally. A leak-resistant design is particularly important when carrying electronics, maps, spare clothing, or other items that should stay dry.
5. Consider Durability and Ease of Cleaning
Trail use can expose a bottle to drops, dirt, temperature changes, and repeated handling. Look for sturdy construction, a reliable seal, and a lid that can withstand frequent opening and closing. No material is indestructible, so inspect the bottle for cracks, dents that affect its function, or damaged seals.
Cleaning should not be an afterthought. Bottles with removable lids and wide openings are often easier to wash thoroughly. If a design has a straw, silicone gasket, or several small parts, make sure those components can be removed or cleaned according to the manufacturer’s instructions.
After each hike, empty the bottle, wash it with suitable dish soap and water, and let all parts dry completely before storage. Do not assume that a bottle is dishwasher-safe unless its care instructions confirm it.
6. Decide Whether Insulation Is Worth It
Insulated bottles can keep water cooler in warm weather, which some hikers find more enjoyable. They are also useful for carrying warm drinks in cold conditions when the bottle is designed for that purpose.
However, insulation usually increases weight and bulk. If you mainly hike short distances and drink ordinary water, a lightweight non-insulated bottle may be more practical. If temperature control is important to you, compare the bottle’s stated insulation performance with its filled weight and dimensions.
7. Think About Water Refills and Treatment
If your route includes reliable refill points, a smaller bottle may be enough between stops. On routes without dependable sources, you may need to carry a larger supply. Never assume that clear water from a stream or spring is safe to drink without appropriate treatment.
If you plan to collect water outdoors, check that the bottle opening works with your filter or treatment system. Some bottles are convenient for storing treated water but less suitable for collecting water from shallow sources. Keep untreated water separate from clean drinking water when your setup requires it.
Make Your Final Choice
Before buying, consider your usual hiking conditions and ask yourself a few practical questions:
-
Does the capacity suit my route and refill options?
-
Is the filled weight reasonable for the distance I hike?
-
Does the bottle fit my backpack’s pockets or storage space?
-
Can I open, drink from, and seal it comfortably?
-
Is it easy to clean and maintain after muddy or dusty outings?
-
Do I genuinely need insulation, or would a simpler bottle work?
The best hiking water bottle is not necessarily the most expensive or feature-packed model. It is the one that carries enough water for your needs, fits your gear, and remains easy to use and clean over time. Choose for your actual hiking habits, and you are more likely to find a bottle that earns a permanent place in your pack.